
01 • Read the prime symbol
What does R′ mean?
R′
Read the full explanation
R names the right face. A prime mark means the inverse quarter turn: anticlockwise when looking directly at that right face. It does not rotate the whole cube.
READ • CHECK • PRACTISE
These short exercises use standard 3×3 face notation. Keep your physical cube in the same orientation while reading: clockwise is defined as viewed directly toward the named face.
01 • Read the prime symbol
R names the right face. A prime mark means the inverse quarter turn: anticlockwise when looking directly at that right face. It does not rotate the whole cube.
02 • Read a double turn
The letter U refers to the upper face and 2 means two quarter-turns, or 180 degrees. For a half-turn, clockwise and anticlockwise produce the same final face position.
03 • Distinguish a face from a layer
A monochrome white face is not proof that the first layer is solved. The adjacent stickers on its corners and edges must also agree with the corresponding side centres.
Move notation describes actions; colour matching checks whether pieces are in the right places. Use both together. A four-move sequence is practice, not a universal solution to every scramble.
Practise on the interactive cubeBeginner course
Original Rubik 3×3 lessons, from the daisy and white plus sign to last-layer edges, with interactive move diagrams.
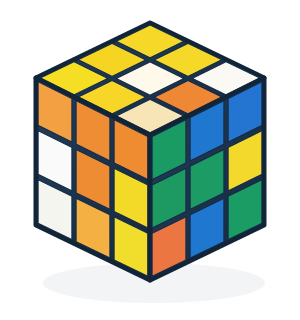
A real cube state produced by legal turns. Rotate, inspect the six faces, then choose your learning stage.
Follow three clear stages, from reading moves to completing the last layer.
01Basics and notationUnderstand the six faces and how to read moves.02First and middle layersBuild the white cross, then corners and middle edges.03Last-layer completionOrient yellow, then finish the remaining pieces.The daisy places four white petals around the yellow upper center. The white plus sign is completed on the bottom face after matching each edge’s side color to its center.
Every diagram begins with a solved cube to demonstrate the precise effect of each turn, not an actual scramble case. Set up the required cube orientation before practising on your cube.
The beginner method builds reliable landmarks rather than memorising long sequences immediately: understand center colors, construct a white cross, fill corners, then the middle layer.
During the last layer, separate orientation from permutation. A cubie can show the right color upward yet still occupy the wrong position. Check both before declaring the cube solved.
For each of the four white edges, compare its white sticker with the white centre and its other sticker with the neighbouring centre. Four white stickers on top do not by themselves prove an aligned cross.
Look at all four white-edge side stickers; correct the first side-centre mismatch before starting the corners.
After inserting a first-layer corner, verify its two side stickers. For the middle layer, choose an edge without yellow and compare both colours with centres before deciding whether it belongs left or right.
After each sequence, recheck the white layer and inserted middle edges; begin the yellow layer only once those earlier parts remain correct.
The learning route begins with centers and turn notation, then constructs a correctly aligned white cross, inserts its four corners, finishes the middle layer, and solves the last-layer orientation and positions. Do not advance merely because the visible upper face has one color. Before each stage, check that the previous stage still matches every relevant center.
The 3D demonstration shows legal turns, but its prepared starting states may differ from your scrambled cube. Name the target piece and its intended slot before pressing Next. After each move, compare the two or three stickers on the affected piece with the fixed centers. If the state differs, stop and explain why rather than copying the following movements.
A white cross is complete only when its four side colors match centers; a first layer is complete only when the corners agree too. The last layer needs orientation and permutation. Keep this short checklist beside the simulator and mark each stage only when the whole stated requirement is satisfied.
Follow the cube from piece identity and notation through layers and deliberate practice. Each topic includes a self-check and Arabic counterpart.